Dash skirt
The stock display is mounted in the dashboard of the original bike. This is a very rugged industrial display that has a lot of well thought out options. Retaining this display is quite easy for the multiple mounting options given by the MFG...
The display test fit with Ram Mount fitted to fabricated 'dash'.
The display fits well integrated into the naked look of the bike, but the back side of the display is a bit unfinished.
Tight space, but there is room for improvement...
First take on a 3D model...
Revised 3D model with a cutout for the cables/wires.
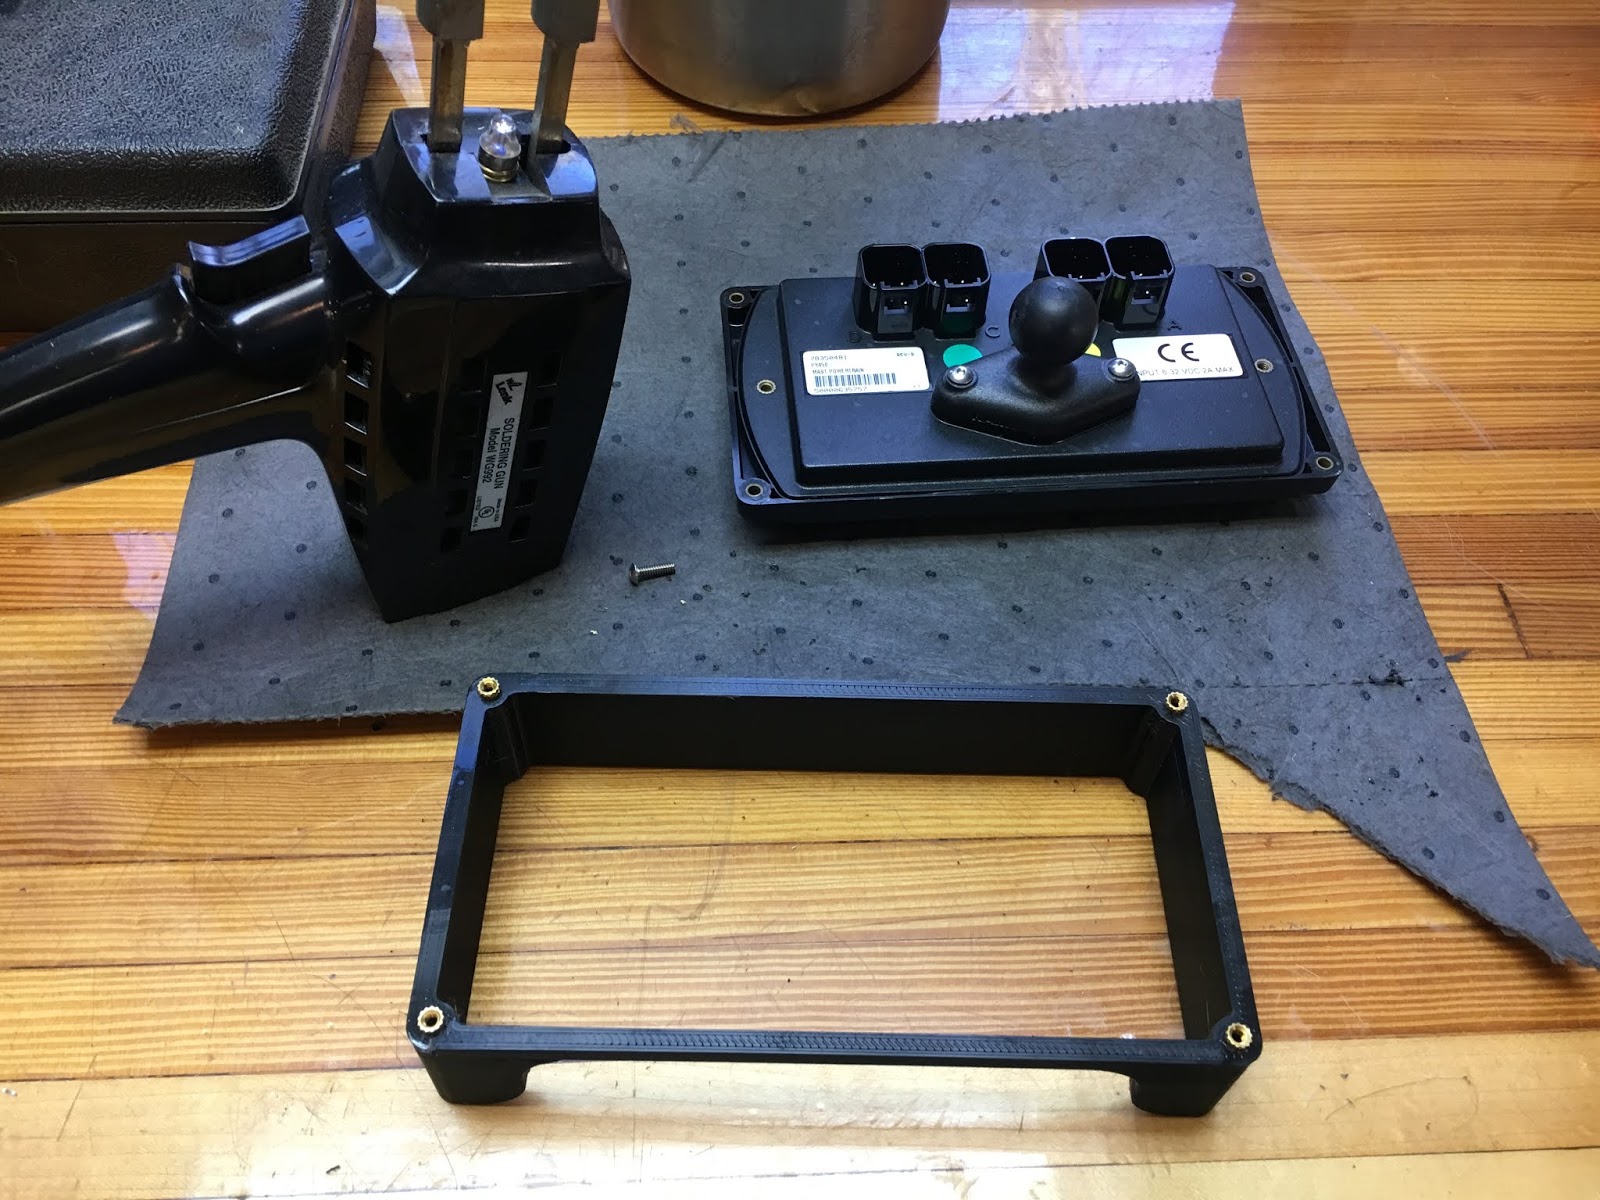
Holes were drilled for the heated installed brass inserts.
A soldering iron is used to heat up the brass and melt it into the 3D printed skirt. The process takes about 10 seconds with a hot iron.
Very little pressure is needed. The plastic cools in about 10 more seconds for an insert that is very difficult to remove using the 6-32 screws.
Inserts are found in SAE and metric sizes from McMaster
Inserts flush with the surface. Some plastic slag from drilling the holes breaks away quickly.

Display fit and mounted with stainless dome head hex screws
Deutsch brand plugs are used throughout the bike including the display. I have a full set of connectors, crimpers, etc. Very handy for modifications.
A few blank black inserts to fill the unused connectors was in order. I will change out the factory bike connector to black soon.
The black is much more UV stable than the factory grey.
Display skirt looks pretty good and hides the connectors well.
Works just as intended.


No comments:
Post a Comment